A favicon is the small icon that appears in the browser tab when someone visits your WordPress site. It acts as a visual identifier, making it easier for visitors to spot your site among multiple open tabs, especially when the page title isn’t fully visible.
In this guide, we’ll walk you through what WordPress Favicon is, why it matters for user experience and branding, and how you can create one easily. We’ll also go over various methods to add a favicon to your website, so you can choose the approach that works best for your setup and comfort level.
What Is a Favicon?

A favicon is a small image often your website’s logo that represents your WordPress site across various browsers and devices. Typically square and low-resolution, it reflects your brand’s identity through elements like color schemes and symbols. Favicons can be designed using graphic design tools like Photoshop or generated directly within WordPress using built-in features.
While they might seem minor, their presence significantly influences how professional and trustworthy your website appears. In today’s browsing experience, users expect to see favicons in their tabs or bookmarks, and a missing icon can make a site feel incomplete or less credible. On the flip side, a well-designed WordPress favicon reinforces your brand identity and improves user experience by making it easier to recognize and return to your site, especially when navigating through multiple open tabs or saved bookmarks.
This small icon plays a significant role in enhancing user experience. It helps users quickly identify your site when multiple tabs are open and also appears alongside your website link in search results, improving visibility. Adding a favicon to your website is a simple yet effective step to boost brand recognition and site professionalism.
Additionally, when someone saves your site as a shortcut on their mobile device, the favicon becomes the app-like icon on their home screen. A recognizable, well-designed favicon not only strengthens your site’s branding but also makes your web presence appear more polished and trustworthy.
How to Create a Favicon for Your WordPress Website
Designing a favicon for your WordPress site can be done using graphic software or through user-friendly online tools like Real Favicon Generator. The method you choose depends on your design skills and how comfortable you are with editing tools.
Here are some important points to consider when generating a wordpress favicon:
- Size & Resolution: Favicons are small by nature, typically shown in browser tabs or search results. The recommended size is 512 x 512 pixels, which ensures it displays well across all devices and platforms.
- Aspect Ratio: Stick to a 1:1 ratio (square format) to prevent distortion or cropping. A mismatched ratio can result in your icon looking unprofessional or incomplete.
- Color & Background: If your favicon includes white or light elements, a transparent background helps it stand out more. Ensure the color scheme aligns with your brand to maintain visual consistency across your site.
- File Type: For transparent backgrounds, PNG is the best option. However, WordPress also supports formats like ICO, JPEG, and GIF, depending on your design needs.
- Search Engine Compliance: Make sure your favicon meets Google’s favicon standards to ensure it appears correctly in search results.
Pro Tip: Avoid changing your favicon frequently. A consistent icon helps reinforce your brand recognition and keeps your website memorable for repeat visitors.
Methods to Add a WordPress Favicon in Website
There are several ways to include a custom wordpress favicon on your WordPress site. All methods deliver the same result. Choose the one that fits your workflow best.
1. Adding a Favicon Using the Editor
If you’re using a block-based theme and WordPress version 5.9 or later, the Gutenberg editor offers a straightforward method to set your favicon.
Here’s a step-by-step guide:
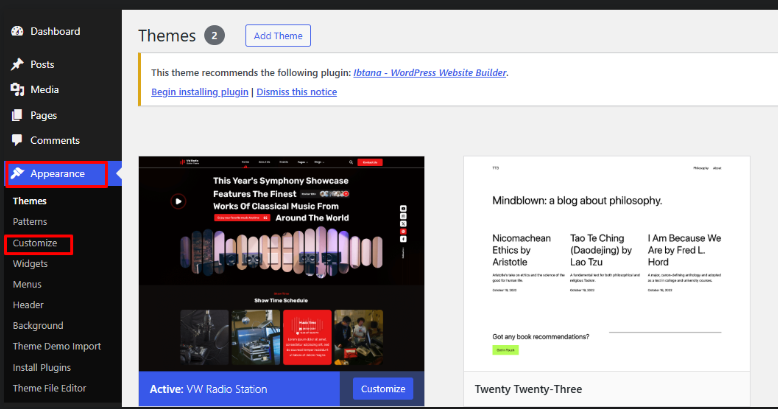
- Log in to your WordPress dashboard, then go to Appearance → Editor.
- In the site editor, hover over the header area this is where most users place their site icon and click the plus (+) button to add a block.
- Search for and select the Site Logo block.
- Click the Upload icon or select a file from the Media Library to add your favicon image.
- Once your image appears, select it, and look to the right-hand sidebar.
- In the block settings (you may need to click the Settings icon in the upper-right corner), enable the option labeled “Use as site icon.”
- Click Save in the top-right corner to apply the changes.
Now when you load your website, your custom wordpress favicon should appear in the browser tab, replacing the default WordPress symbol.
2. Set a Favicon via the WordPress Customizer
If you’re using a classic WordPress theme, the Customizer provides a user-friendly way to upload and set your site favicon. This approach is available for WordPress versions 4.3 and above.
Follow these steps to add your favicon:
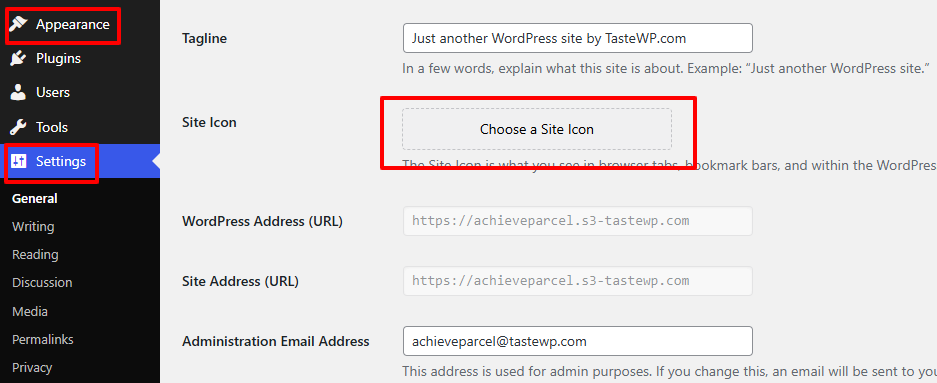
- In your WordPress dashboard, go to Appearance → Customize. Tip: If you don’t see the Customizer in the menu, you can access it directly by entering
/wp-admin/customize.phpafter your site’s domain name. - In the left-hand menu, click on Site Identity.

- Under the Site Icon section, click the Select site icon button.
- Choose your image from the Media Library or upload a new file from your device. Once selected, click Select.
- If needed, you can crop the image to adjust its dimensions. Or, click Skip Cropping to keep the original size.
- A preview of your favicon will appear in the Site Identity panel. Once everything looks good, click Publish to make it live.
Your new wordpress favicon will now appear in browser tabs, bookmarks, and on devices where your site is saved to the home screen.
3. Use the RealFaviconGenerator Plugin
For those who want more control over their site’s favicon design and how it appears across devices, using a plugin is a practical option. One of the most popular tools for this is the Favicon by RealFaviconGenerator plugin.
Once you’ve installed and activated the plugin, here’s how to set up your favicon:
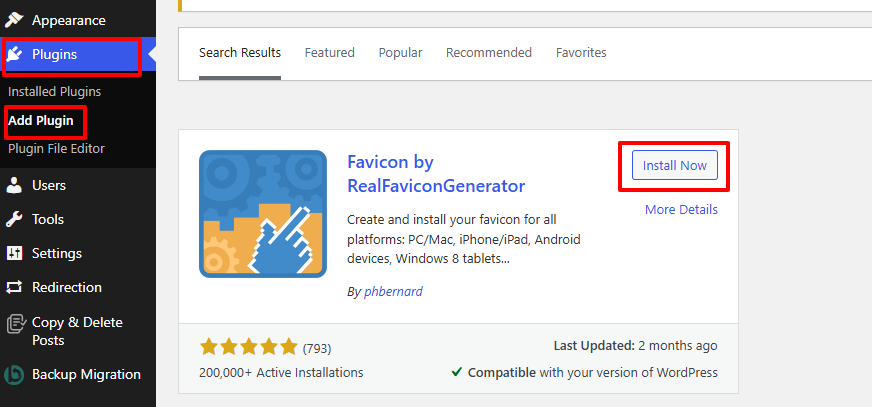
- From your WordPress dashboard, go to Appearance → Favicon.
- Click Select from the Media Library to upload a new image or choose an existing one.
- After selecting your image, click Generate favicon. This will take you to the RealFaviconGenerator’s external page.
- If you’re satisfied with the current image, choose Use the original image as is. Otherwise, you can adjust settings like padding, background color, and corner radius for better presentation.
- Scroll to the bottom and click Generate your WordPress Favicons and HTML code to confirm your selections.
- You’ll be redirected back to your WordPress dashboard where you can click Check your favicon to verify if it’s working correctly.
Important: The plugin must remain active on your site for the favicon to continue displaying. If it’s deactivated or deleted, the icon will disappear.
To ensure optimal performance and security, make
4. Add a Favicon Manually by Editing Theme Files
If you’re comfortable with code and want full control over how your wordpress favicon is implemented, you can manually upload it and insert the necessary code into your theme. This method is best suited for developers or experienced WordPress users.
Note: Always use a staging site to test code changes before applying them to your live website. Also, create a child theme to prevent updates from overwriting your custom favicon code.
Step-by-Step Instructions:
- Visit the Real Favicon Generator site and upload your favicon image.
- In the Favicon Generator Options, go to the Path tab and choose to place the icons in the root directory (recommended).
- Click Generate your Favicons and HTML code to get your custom favicon package.
- Download the favicon zip file and save the HTML code snippet provided on the next screen. Keep this tab open or save the snippet for later use.
Upload Files to Your Site:
- Access your site’s root directory (public_html) using an FTP client like FileZilla or your hosting file manager.
- Extract the contents of the downloaded favicon package and upload only the files (not the folder itself) to the public_html directory.
- Verify the upload by visiting
yourdomain.com/favicon.ico. If the icon appears, it’s been uploaded successfully.
Add the Code to Your Theme:
- In your WordPress dashboard, go to Tools → Theme File Editor.
- Open the
header.phpfile from the right-hand sidebar. If unavailable, usefunctions.php. - Paste the HTML code snippet from Real Favicon Generator right before the closing
</head>tag. - Click Update File to save your changes.
To remove the favicon, simply delete the uploaded files and remove the code from your theme file.
Conclusion
A favicon might seem like a small detail, but it plays a big role in your website’s user experience and branding. It appears in the browser tab, bookmarks, and even as a shortcut icon on mobile devices, helping users easily recognize and return to your site. Having a custom wordpress favicon not only enhances your site’s visual identity but also adds credibility and professionalism.
Creating a favicon is straightforward you can design one using graphic software or a user-friendly online tool like Real Favicon Generator. Ensure that your favicon is square-shaped, at least 512 x 512 pixels in size, and follows Google’s favicon guidelines for best display results.
Depending on your theme and technical comfort, there are several ways to add it to your WordPress site. You can use the Gutenberg block editor, the WordPress Customizer, or a trusted plugin. If you’re using a wp theme bundle, you’ll often find built-in support for these options. For advanced users, manually adding it through the theme’s files offers greater customization and control.
No matter which method you choose, adding a wordpress favicon is a simple yet effective step in improving your site’s identity and user experience.